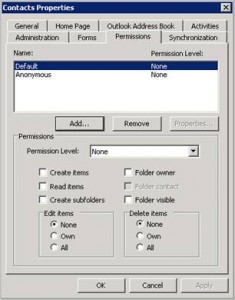
Just as you might have an assistant who helps you manage your incoming paper mail, Microsoft Outlook provides similar functionality by making it possible for you to give another person access to your Inbox and any other Outlook folder you want. The process of granting someone permission to open your folders, read and create items, and respond to requests for you is called delegate (delegate: Someone granted permission to open another person’s folders, create items, and respond to requests for that person.
As the person granting permission, you determine the level of access the delegate has. You can give a delegate permission to read items in your folders, or to read, create, modify, and delete items. You can give a delegate permission to send mail and to respond to mail on your behalf. The delegate can also organize meetings on your behalf and respond to meeting requests and task requests sent to you. By default, if you grant someone access to your folders, that delegate has access to the items in the folders, except items marked private. You must grant additional permissions to allow access to private items.
You can grant a user access to your mailbox by performing the following steps:
1. Open your Outlook 2003 and select ‘Options’ from the ‘Tools’ menu.
2. Select the ‘Delegates’ tab and click ‘Add’.
3. From the user list select the user or users to whom you want to delegate access and click ‘Add’, as the figure shows. Click OK. (Note: To add multiple delegates simultaneously, hold down CTRL and click names in the Name list. The permissions that you select apply to all of the delegates.)
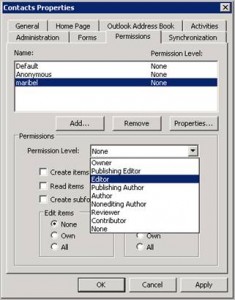
 4. Now select the rights that you want this delegated user to have. By default, users are given only Calendar and Tasks access, but you can give access to other areas (e.g, Inbox, Contacts) at the different levels available (e.g., Reviewer, Author, Editor). Notice you can also select the option to send the delegate an email message confirming the access level and the option that sets whether the delegate can see items marked private. We will the content of this email later. Click OK.
 5. Click OK to the main ‘Options’ dialog box.
 6. Now from the delegated user’s Outlook we can open the message delivered with the delegate permission information.
Depending of the level of delegated permissions you can now share your Inbox, Contacts, Calendar, etc.
What if the Delegates tab is missing?
If you don’t see the Delegates tab in the Options dialog box, you need to install the add-in to use the Delegate Access feature.
1. On the Tools menu, click Options.
2. Click the Other tab.
3. Click Advanced Options, and then click Add-In Manager.
4. Select the Delegate Access check box, and then click OK.
5. If you don’t see the Delegate Access check box, do the following:
6. Click Install, and then click the Dlgsetp.ecf file.
7. Close and reopen the Options dialog box.
8. Click Add.
9. Type the name for your delegate or select it from the Name list.
10. Under Add Users, click Add, and then click OK.
The Delegate Permissions dialog box should appear.
Private Items:
By default, the delegate is not allowed to see private items. To allow the delegate access to the items that you mark as private, select the Delegate can see my private items check box.
![]()
Mark a message as Private, Personal, or Confidential
1. Right-click the message that you want to set the sensitivity level for, and then click Options on the shortcut menu.
2. In the Sensitivity box, click the option that you want:
1. Private means that the recipient will see “Please treat this as Private” in the InfoBar: Banner near the top of an open e-mail message, appointment, contact, or task. Tells you if a message has been replied to or forwarded, along with the online status of a contact who is using Instant Messaging, and so on.) of the message you send.
2. Personal means that the recipient will see “Please treat this as Personal” in the InfoBar of the message you send.
3. Confidential means that the recipient will see “Please treat this as Confidential” in the InfoBar of the message you send.
Note: Marking a message with one of these settings is advisory only. Recipients can take any actions on the message that they want to, such as forwarding the message to another person. If you want to help prevent recipients’ actions on a message, you can create an e-mail message with restricted permission.
by George Lopez-Henriquez / www.inetnj.com


