![]()
 Quality Computer Services at Affordable Prices
Serving New Jersey and New York City since 1996
Phone: (973) 663-4715
Windows XP Offline Files for My
Documents
By George Lopez-Henriquez (www.inetnj.com)
Description:
Offline files allow us to synchronize files between a shared network location and an individual computer. Using this Windows feature, every time you log off from the network, the files set for synchronization will download from the network to your computer. Likewise, when you connect to the network after being disconnected, your computer will synchronize the files that have been changed with the files stored on the network.
How to
Configuring Windows XP Offline Files for My Documents:
Before we can configure Offline Files we need to create a shared folder in the server where we can host the user My Documents folder. Some server environments has assigned to their users a home drive map to their servers. If that is your case you can use this mapping.
In our example we had created a share folder named Users on our IBM2003 server.
Here are the steps to follow:
1. Enable Offline Files feature:
-
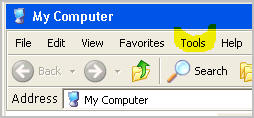
Double-click My Computer and click on Tools
-
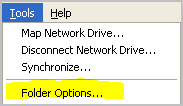
Click on Folder Options and select the Offline Files tab.
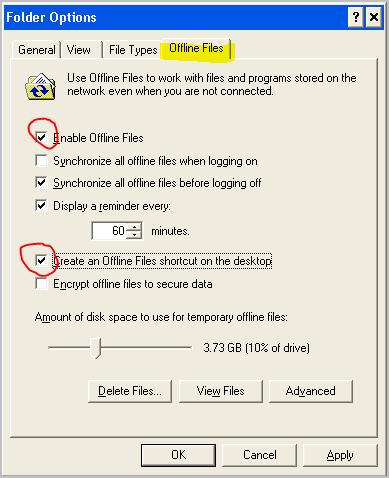
Check the Enable Offline Files option box and the Create an Offline Files shortcut on the desktop then click ‘OK’
If you get the following window. Then you should disable Fast User Switching from your computer before you can enable Offline Files.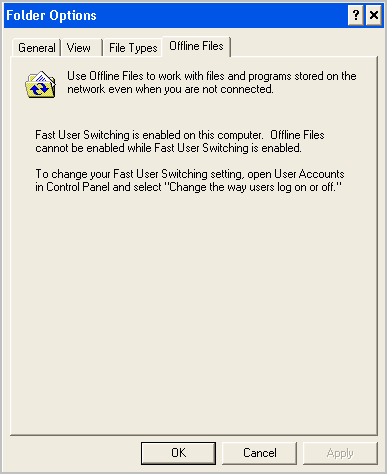
To disable Fast User Switching open the Control Panel and open the User Accounts.

Uncheck the Use Fast User Switching.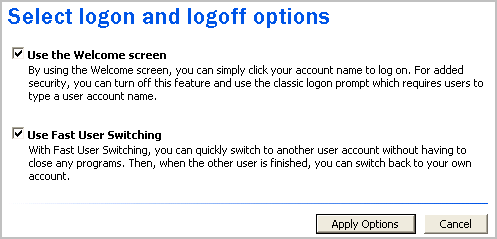
Notice that if you try to do it from a Remote Desck top Connection you will get the Following error.
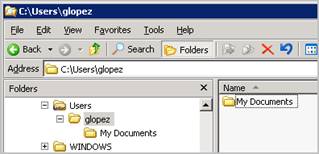
2. From the server console, create a My Documents folder under the user network shared folder.
-
In our example the user network shared folder is located at the \\IBM2003\Users\glopez folder. Here we create a My Documents folder.
-
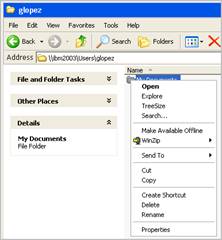
Now from the desktop clisk [Start] --> Run and type the server name presided '\\' (example: \\IBM2003). Locate and right-click the My Documents folder and click on Make Available Offline option and close the Windows.
-
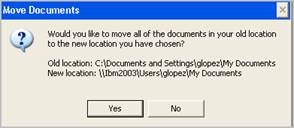
Locate and right-click your desktop My Documents folder and select Properties and enter the path to the user shared location in the Target box and click ‘Apply’.


-
Then click ‘Yes’ in the ‘Move Documents’ windows.
-
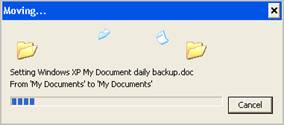
The move process has been initiated. Be sure you have enough disk space on the server disk.
-
Now logoff the workstation

-
Here the Synchronization starts working.

Notice that if you log on in your computer with the network cable disconnected you will get this Offline Files icon:
![]()
If you double-click this icon you can see the Offline Error Status Windows

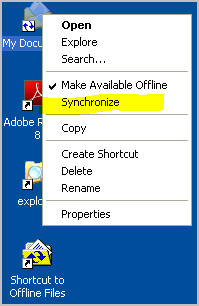
You can force a synchronization by right-clicking My Documents and select Synchonize.
Schedule Synchronization:
To enable Schedule Synchronization from the Start menu, point to Programs and then Accessories , and then click Synchronize
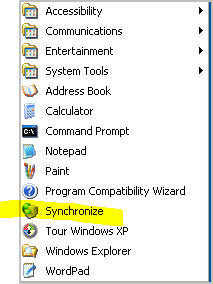
At the Synchronize windows click [Setup] and select the Schedule tab and click Add. Here you can set a schedule time for the synchronization to take place.
Related resources
- Information for Windows based product
- Security issues
- Network installation
- Technical references